


In our previous post on Adding Telerik UI Widgets to MVC, I demonstrated how to import the Telerik widgets into a Visual Studio project and how to add and script a couple basic widgets. Now we will add a data driven Grid widget to our existing project. In order to proceed, you will either need to follow the setup instructions in the earlier post or use the Telerik UI for ASP.NET MVC Visual Studio extensions that were installed with the Telerik installation.Then when creating a new project, select the Telerik ASP .NET MVC Application project type. The wizard will then setup the project by adding the appropriate references and updates to the web.config file. See Figure 1 below.

Figure 1
Add Connection to Northwinds DB to project
We will start by adding a server connection to the Northwinds database by right clicking on the App_Data folder and clicking Add -> Existing Item. Then browse to the install location of the NORTHWND.MDF file and then click OK.
Add Northwind Model
Right click on the Models folder and click Add -> New Item. When the Add New Item dialog window opens, click the Data folder and then ADO.NET Entity Model. Change the Name to Northwind.edmx and then follow the wizard using the defaults and adding just the Products table.
Add Comptroller Functionality for Server Binding
There are two types of data binding with Telerik widgets: server binding and Ajax. We will start with server binding by adding an action function that reads from the Northwind database. Actually, we will update the existing Index ActionResult in the HomeController.cs. Open this file and add code so the Index ActionResult looks like:
public ActionResult Index()
{
ViewBag.Message = "Modify this template to jump-start your ASP.NET MVC application.";
var northwind = new NORTHWNDEntities();
ViewBag.Products = northwind.Products;
return View();
}
Add View Functionality for Server Binding
Next you need to create the presentation layer and we will update the existing Index.cshtml file. Go to the Views -> Home folder and open the Index.cshtml file. At the bottom of the page type:
@(Html.Kendo().Grid((IEnumerable<Telerik.Models.Product>)ViewBag.Products)
.Name("gridProducts")
.Columns(columns =>
{
columns.Bound(product => product.ProductID);
columns.Bound(product => product.ProductName);
columns.Bound(product => product.UnitsInStock);
})
.Pageable()
.Sortable()
)
This code block first sets the data source to the Products property in the Viewbag that we created in the controller ActionResult, making sure to cast to an IEnumberable object of the Product class. “Tekerik” is the name of our namespace, so yours may be different if you setup your solution with a different name. The Columns property is set to a lambda expression binding to the columns to the Products table. And the Pageable and Sortable methods are all that is needed to add this functionality to the grid. Run the application to see a pageable and sortable grid bound to the Products table. See Figure 2.
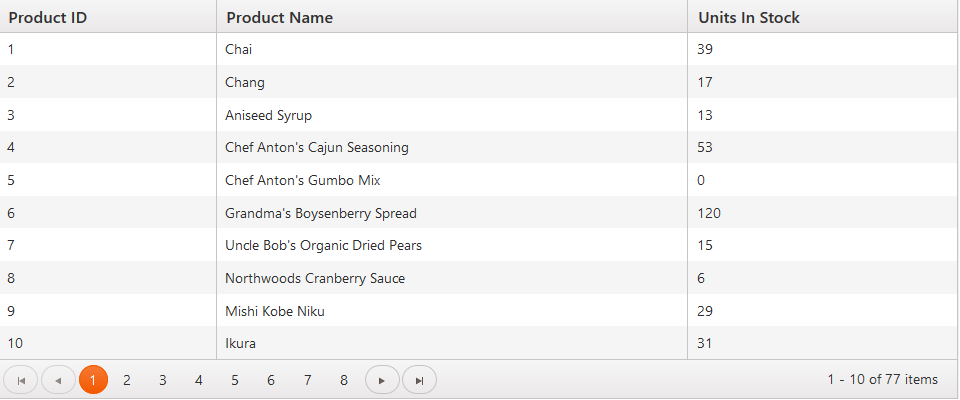
Figure 2
Add Comptroller Functionality for Ajax Binding
As you can see from the above server binding example, when you click a page button or column header, the page reposts back to the server in order to update the grid. A more user friendly solution is to bind the grid with client side Ajax script. To start, open the HomeController.cs file again and create a new ActionResult called Products_Read having an attribute DataSourceRequest. Within the body we will use a Using statement with the entities object and an IQuerable for the Product class. The method will return a json string serialized with a DataSourceResult object of the Products class. The ActionResult code should look like:
public ActionResult Products_Read([DataSourceRequest] DataSourceRequest request)
{
using (var northwind = new NORTHWNDEntities())
{
IQueryable products = northwind.Products;
DataSourceResult result = products.ToDataSourceResult(request);
return Json(result);
}
}
Add View Functionality for Ajax Binding
The View functionality for the Grid widget is very similar to the server bound example except we add a DataSource and change the grid type to the Telerik.Models.Product where Telerik is once again our namespace. For the DataSource, we add a lambda expression setting Ajax as the type and Read as the Action. The Read includes another lambda expression referencing the Products_Read ActionResult we created in the Home controller. Run the application and the grid functions as before except for the pageable and sortable functions no longer need to post back to the server. They are handled via client side ajax.
@(Html.Kendo().Grid()
.Name("ajaxProducts")
.DataSource(dataSource => dataSource
.Ajax()
.Read(read => read.Action("Products_Read", "Home"))
)
.Columns(columns =>
{
columns.Bound(product => product.ProductID);
columns.Bound(product => product.ProductName);
columns.Bound(product => product.UnitsInStock);
})
.Pageable()
.Sortable()
)
Export to Excel
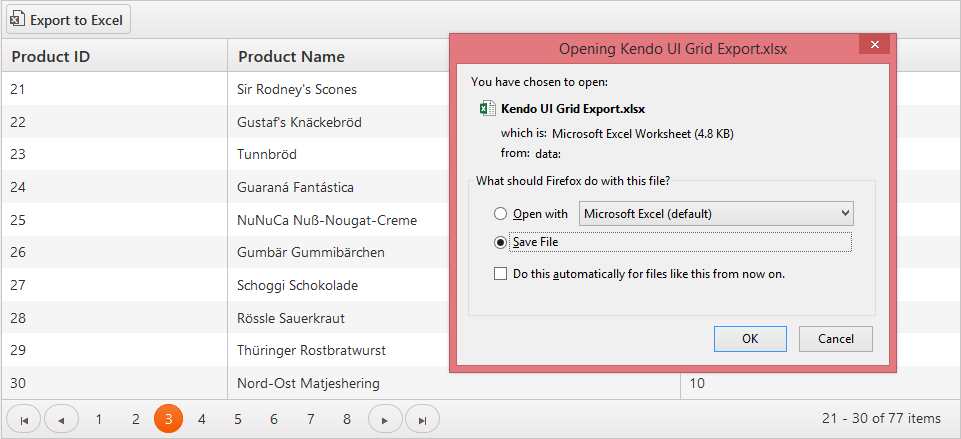
The Telerik Grid Widget also contains an extremely easy interface to export your grid to Excel or to PDF. We will reuse our Products_Read ActionResult in the HomeController.cs and just add a few more properties to the Grid widget we added earlier in the Index.cshtml file. The Toolbar property adds the Export To Excel button on the toolbar and the Excel property sets this functionality. You can export the grid’s current page or to export all records make sure to add .AllPages(true). That’s all it takes. See Figure 3 for the rendered functionality.
@(Html.Kendo().Grid< Product>()
.Name("ajaxProducts")
.DataSource(dataSource => dataSource.Ajax()
.Read(read => read.Action("Products_Read",
"Home"))
)
.Columns(columns =>
{
columns.Bound(product => product.ProductID);
columns.Bound(product =>
product.ProductName);
columns.Bound(product =>
product.UnitsInStock);
})
.Pageable()
.Sortable()
.ToolBar(tools => tools.Excel())
.Excel(excel => excel
.FileName("Kendo UI Grid Export.xlsx")
.Filterable(true)
.AllPages(true)
.ProxyURL(Url.Action("Products_Read", "Home"))
)
Miscellaneous Features of the Grid Widget
Besides the ease in implementing, the Telerik Grid Widget provides several out of the box features. First, it is automatically responsive. Just change the size of your browser to see how the grid changes to match the smaller layout. Second, it can be manipulated by JQuery to change properties, columns, data source, and so on. Finally, there’s column auto filtering functionality; the ability to add a grid within a grid for hierarchical grids; allow users to reorder columns; and many more.
Need Help? Contact us