


In my previous blog, I discussed how to set up a report page with dynamic search criteria using a filter builder from the SmartClient framework. In this blog, I will explain the datasource driven part of the filter builder search functionality. Figure 1, displays the entire page for this functionality. As you can see below, the filter builder is in the top section of the page and the results will be displayed in the grid in the second section of the page.
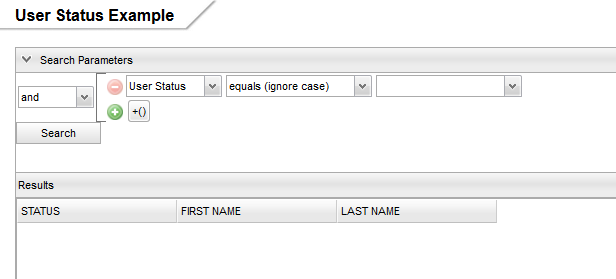
Figure 1
Below is the code I used to create the Results grid:
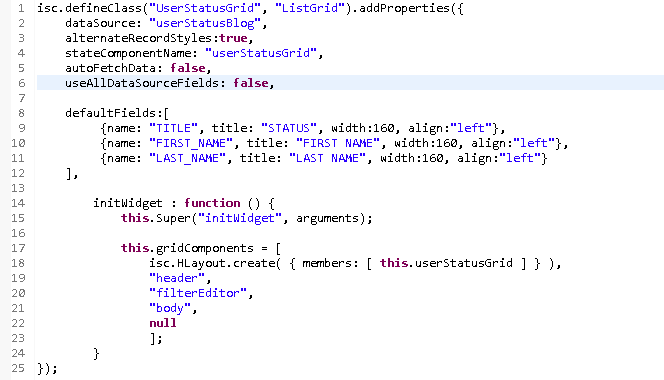
Figure 2
I have set the dataSource property value to the datasource file name I will be using to retrieve the results from the database. This file is called “userStatusBlog.ds.xml”. I have set my defaultFields property to the fields I want to display in the results grid, which I will also be returning from the datasource. When the user selects the filter and value, the criteria will be sent to the datasource’s fetch operation binding as shown in Figure 4 below. In my previous blog, the datasource field I created was named “STATUS”, shown in Figure 3.
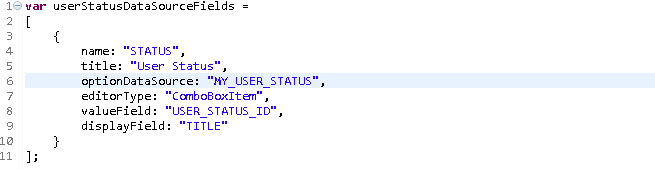
Figure 3
I explained this code in part 1 of this blog, in order for this to work, the MY_USER_STATUS datasource needs to be created in order to set the optionDataSource attribute above. This datasource is created in the code in Figure 4.
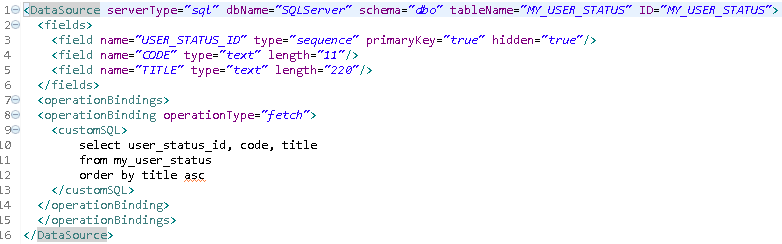
Figure 4
The MY_USER_STATUS database table used in Figure 4 is shown below:
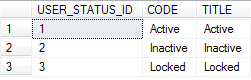
Figure 5
The Figure 4 code identifies the drop down list datasource. It shows the tableName that will be used from the SQL Server database. The ID in line #1, will allow it to be referenced by name in Figure 3 line #6. In this datasource, I set the fields I want returned from the database. I also created a fetch operation binding with a custom sql tag that will query all the statues from the MY_USER_STATUS table and return the list to be used in the filter builder drop down.
Figure 6 below, is the last part of this functionality. This will be the datasource that will apply your criteria and return the results of the search. The fields added will need to be the same fields you want displayed in the grid and the names of the fields should match the names in the grid. In the operation binding section, I’m using a customSQL tag so I can display the actual query I am running. You are also allowed to use stored procedures and pass parameters to the database in this section.
The STATUS field, identified as “name” in Figure 3, will be passed as “$advancedCriteria.STATUS” to the datasource below. Here, I will set that value to a parameter to use in my custom SQL statement.
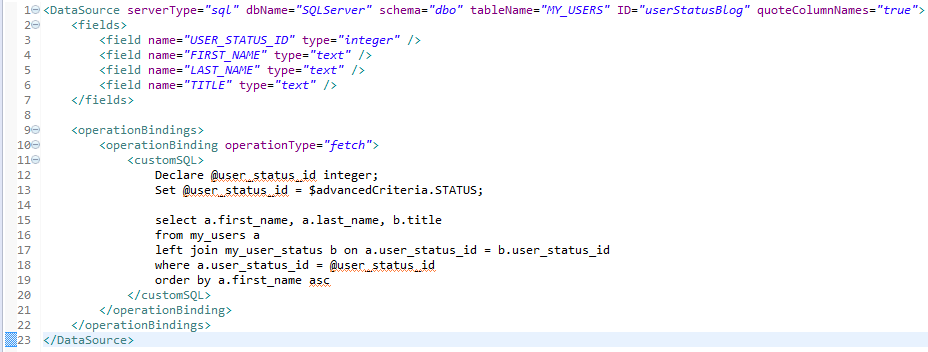
Figure 6
The MY_USERS database table used in Figure 6 is shown below:
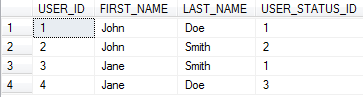
Figure 7
This query will pass the user status selected from the drop down filter by passing the user_status_id and will query all users in the table whose account has the selected status. It will then return the status, first name, and last name of all the users.
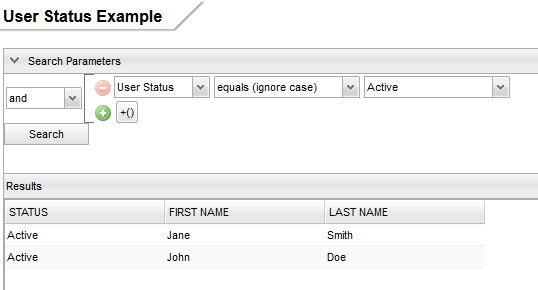
Figure 8
In Figure 8, I have selected “Active” from the drop down list to search for all user accounts with a status of “Active”. After clicking the “Search” button, the results are then displayed in the Results grid. The query returned two records as expected. Looking at the MY_USERS table, it shows two users having a user status id of 1 (Active).
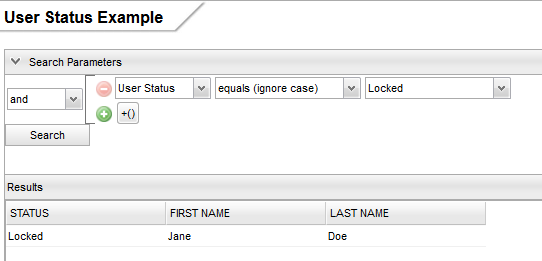
Figure 9
In Figure 9, I selected “Locked” as the status and as expected, one record was returned. Looking at the MY_USERS table, it shows only one user having a user status id of 3 (Locked).
In summary, I found it easier to build the entire layout of the page first and then add the functionality piece by piece. Here is the order in which I did things:
- Created the page layout using SectionStack.
- Added the Search Parameters and Results section.
- Created the Filter Builder and the Search button for the Search Parameters section.
- Created the grid for the Results section.
- Created the MY_USERS and MY_USER_STATUS database tables.
- Created the datasource fields for the filter builder filter drop down list.
- Created the datasource to retrieve the filter builder values for the User Status drop down list.
- Created the datasource to retrieve the results from the search criteria.
As a beginner using SmartClient, I find that the development is a little confusing to follow at times but like anything else, after a while you get the hang of it. Hope you have enjoyed reading through this simple filter builder example.